Dark and moody portraiture has become quite popular over the past few years. It is a style many (myself included) are drawn to. Whenever I get the chance to shoot something creative, I tend to gravitate towards doing at least part of my session with a dark influence.
Often times, I like shooting dark and moody work with a single light and a reflector. Although, there are times when it is useful and appropriate to use multiple lights to add to the complexity of a scene. Sometimes I will use a second or third light to specifically show itself as a bold kick light that opposes a key light. Other times, I work to shoot with multiple lights in a way that blends them and makes it less obvious how many lights I am working with. Today, I want to talk about and walk you through the setup of a recent session that made use of this light blending method.
Everyone has their own methodology for planning out a session, ranging from a very specific concept to more loosely constructed methods. I tend to run closer to freeform with some mental preparation and experimentation ahead of time. I like to come up with sets in my mind’s eye to imagine ways I can create shots. Although, the day of, I end up being highly adaptive and improvisational.
The images from this session were based on some new thought experiments I’ve been refining since shooting a session with fellow Flashpoint creative and all-around photographic genius Jonny Edward.
My session with Jonny mainly used a constant fresnel light shot through some haze from a fog machine. It also included the modeling light of one of his Flashpoint Xplor 600 strobes with a large beauty dish for a fill on the front side. This concept was one of several looks Jonny and I shot that day, but it was the one I was most excited to revisit.

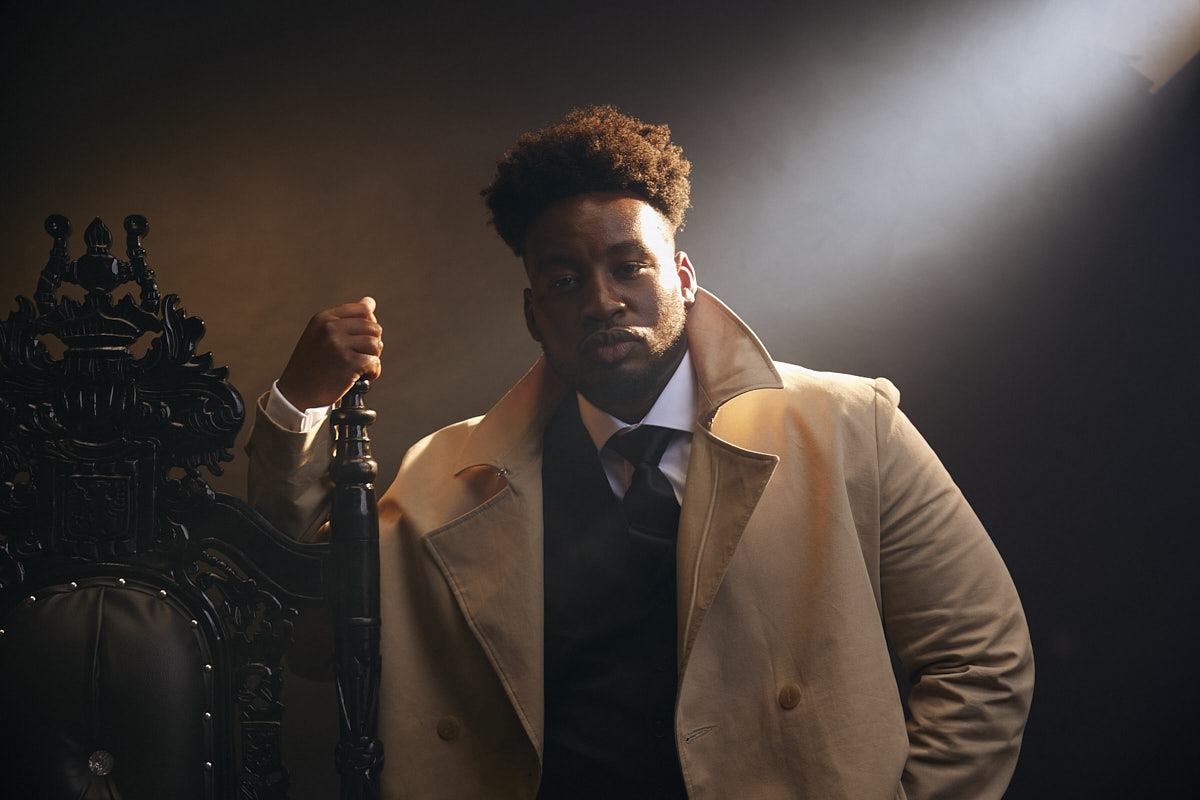
The subject of this session is my good friend Andre Wheton, a fellow photographer I have mentored a bit and with whom I share a studio space. He asked me early this year if I would be willing to shoot a session with him for his birthday. He told me he would be renting the throne we see in the images, and gave me some ideas of what he wanted of his wardrobe. Otherwise, he told me to just use this session as an excuse to be creative in the ways I saw fit.
As the session approached, I had my previous session with Jonny in mind. I knew I wanted to shoot with a fresnel as back lighting again, and that this time I wanted to implement actual flash rather than just using the modeling lights on my strobes.
So let’s get into the details of how this session was shot!
As I said, I tend to be pretty improvisational while I shoot. I am constantly shifting lights and tweaking things to perfect the concept. I often use my entire shoot time as a long iterative process where I work to create slightly different versions of a shot, or to play around with different types of framing, composition, and ratios of lights to one another. All of that is to say, I outline my setup to give an overall idea of how I was playing in the space and not tied to a completely fixed setup the entire time.
Gear
- Canon R6
- Tamron 24-70mm f/2.8 G2
- Tamron 70-200mm f/2.8 G2
- 2x Flashpoint Xplor 400 pro
- Glow EZ Lock Deep Parabolic Quick Softbox (38″) with both baffles
- Glow EZ Lock Wing-Like Parabolic Fiberglass Umbrella (60″)
- Flashpoint Xplor 100 Pro
- Flashpoint Round Head Flash Accessory Kit
- Flashpoint V1 Speedlight
- Desisti Monet Fresnel Hot light with a 700 watt bulb
- Smoke Machine
To start, I am standing directly across from my background paper with my subject as the center point from which I will reference placing everything else. I placed the throne so that it faced roughly 40 degrees off axis to camera. I then placed my fresnel at full power around 130 off axis to camera, facing towards the throne.
When Andre sat in the throne, if no other lights were lighting him, this hot light would create a bright rim on the back side of his head that had no wrap to the front.
I chose this placement for the hot light because I wanted to include the light itself in many of the shots I planned to take. As a result of this placement, much of Andre’s face was in deep shadow.

I brought in my first strobe to bring those shadows up. For this light, I used a Flashpoint Xplor 400 Pro with the Glow EZ Lock Deep Parabolic Quick Softbox so that the front baffle was roughly a foot over his head and placed about 2 feet away directly in front of him. As he turned his head toward the camera, I would get an open-loop pattern shot from the shadow (short) side of the face. If I had him look forward (camera right), he would still have nice definition in the structures of his face. Initially, I started with the strobe’s power around 1/128. After shooting at this power level, I turned that strobe down to 1/256th +3. That believably balanced the constant light with this key light while adding multiple steps in contrast on the face from highlight, to a filling key, to shadow.

Next, I brought in my Flashpoint Xplor 100 Pro with the Round Head Accessory Kit to add more depth and dimension to the colors in the frame. I put a full CTO gel and barn doors to control the spill of light on the black seamless paper. This light was dialed to 1/125th + 7 to bring in a pop of warm light on the background. To enhance this look further, I also experimented with placing my Flashpoint V1 speedlight on the throne itself, shooting through the gap between the backrest and the seat area. I found I liked this extra pop of cooler light on the backdrop in some images, while in others it was too much and I would turn it off.

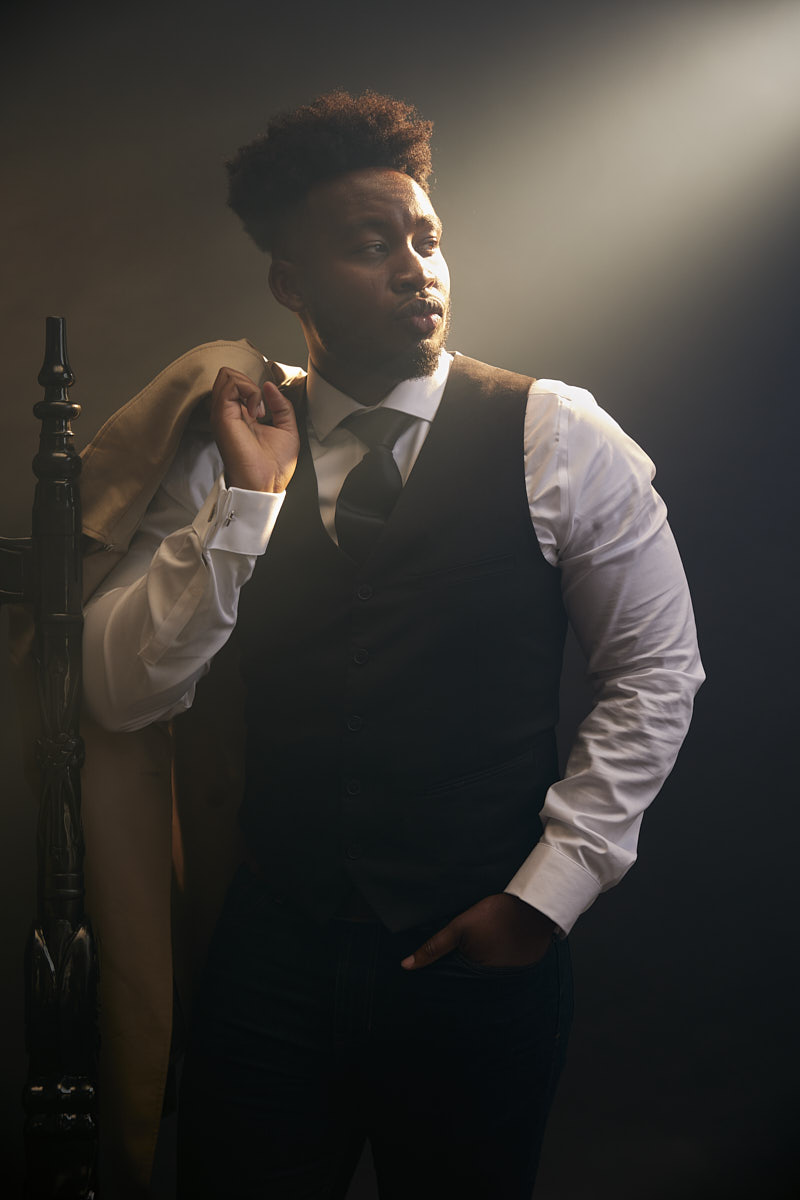
For a third light, I had my other Flashpoint Xplor 400 shooting into my Glow EZ Lock Wing-Like Parabolic Fiberglass Umbrella (60″) with the camera roughly 10 or 15 feet away from the subject also turned down to 1/250th of a second. With this light, I was able to fill in all the other shadows on Andre’s face just enough to maintain detail in the shadow. This is a step that could also be done using a reflector closer up. Since I wanted a free range of motion to move around Andre, I decided to make use of my other strobe unit at a further distance. Note that in the behind-the-scenes photo, we can’t see this third light because it is pulled so far back.
Finally, I rounded out the look by creating atmosphere in the air by using a smoke machine. I often find that the initial smoke that comes off a smoke machine can be too thick in places and doesn’t always have the right effect. I used one of my reflectors to fan the smoke out to create a resulting haze effect in the room. This haze helps the spot light appear as a beam of light rather than just a random light source behind the subject. That said, beware that too much haze in a room can significantly decrease the contrast in your images and can make it hard to focus. As we shot, we had to balance between adding more smoke and then leaving it for a while to dissipate.
I am absolutely thrilled with the results from this session and Andre was as well. It was a fun way to play around with my Flashpoint gear in a manner I hadn’t tried before. Good luck if you are replicating this look and using some of the techniques I outlined in this post!
Article and Photos by Connor Hibbs